To use the Carbon Console, activate it by clicking the "Enable Console" button. The button will turn blue when enabled. This should be done before entering play mode.
Note: The Carbon Console will override all incoming DMX connections
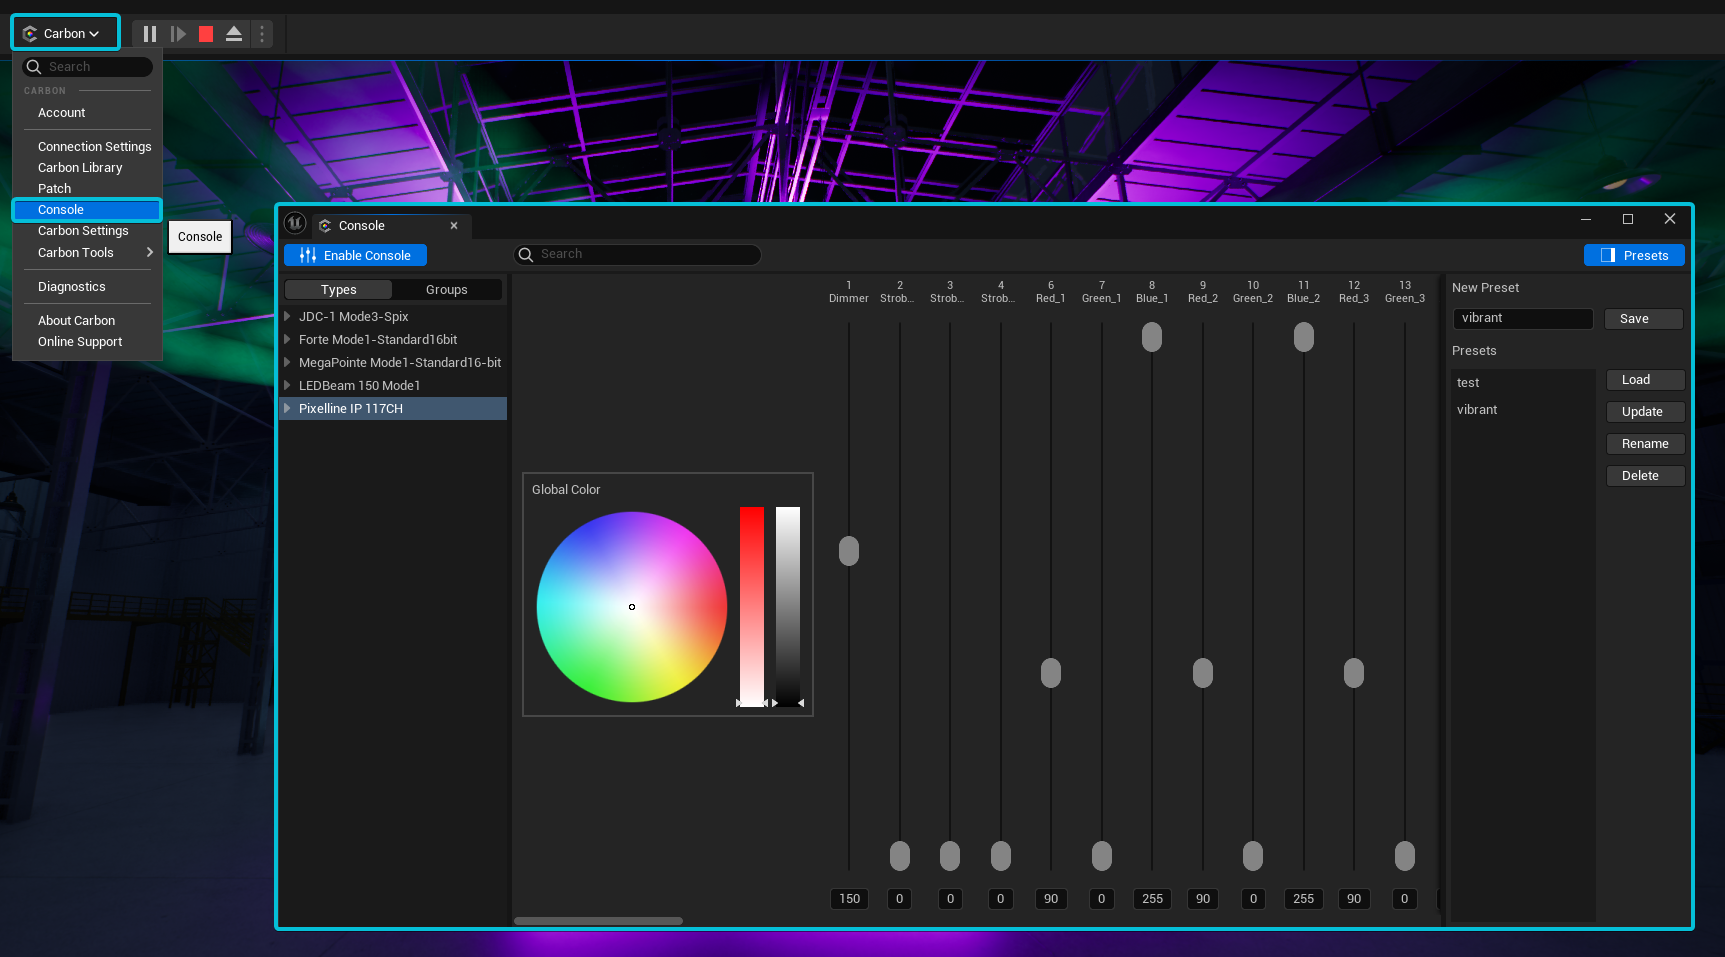
All Carbon fixtures are listed in the left column, organized by type or group. Expand groups to access and control individual fixtures. When a fixture is selected, its adjustable parameters are revealed in the main column alongside a global color wheel for supported lights. Each parameter can be controlled either by sliding the fader with your mouse, or by typing in an exact DMX value on the text field below.
Console Presets
The Carbon Console simplifies the creation of static lighting looks without the need for an external console, thanks to its preset functionality.
Creating a Preset
- Adjust fixtures to your desired look using the sliders in the main column.
- Enter a name for the preset in the text field at the top of the preset column.
- Click "Save" to add the preset to the list.
Loading a Preset
- Select the desired preset from the list.
- Click "Load" to apply the preset to your scene.
Updating a Preset
- Adjust fixtures to the new desired look.
- Select the preset you wish to update.
- Click "Update" to overwrite the existing preset with the new settings.
Managing Presets
- Rename: Select a preset and click "Rename" to change its name.
- Delete: Select a preset and click "Delete" to remove it from the console.
Warning: Deleting a preset is irreversible.